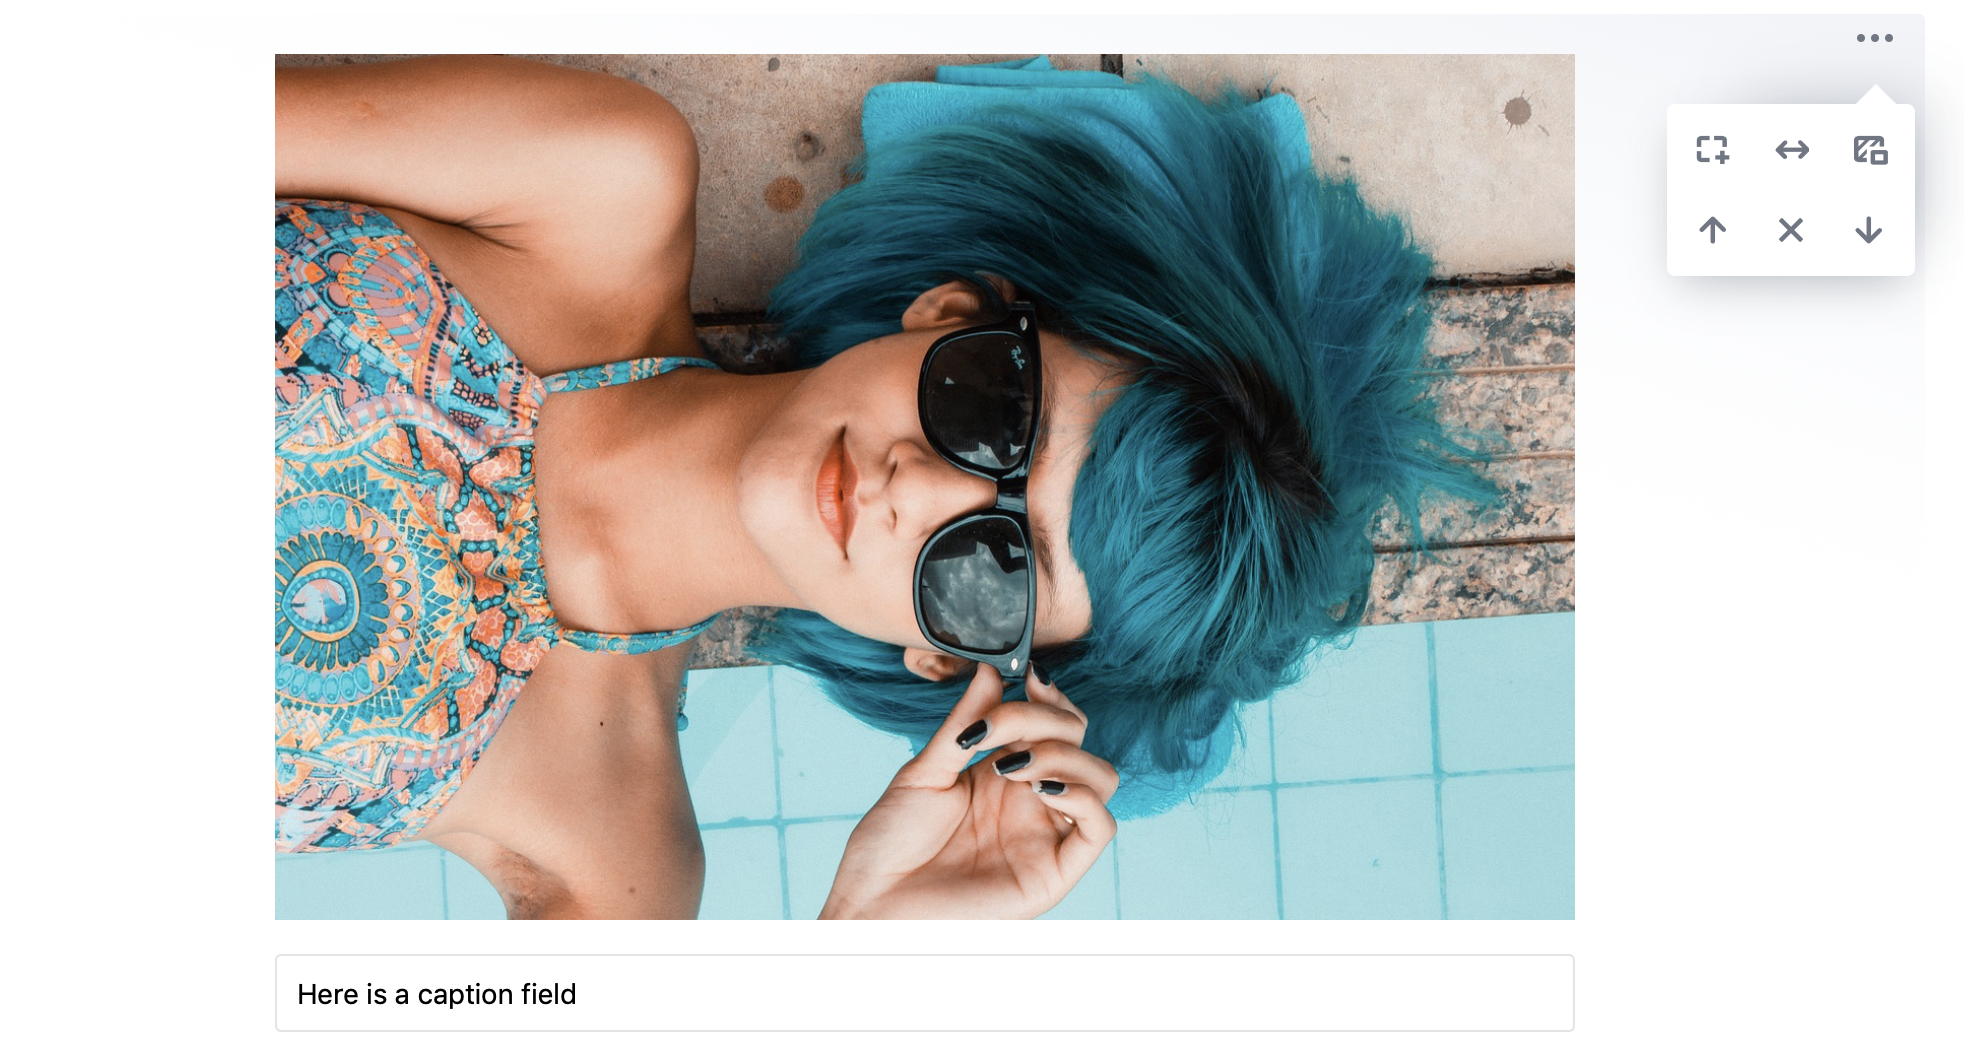
For now, we have a main functionality done. Time to add some advanced features.
In Editor.js each Block has a menu with actions on the right side. By default, there are such actions as moving Block up or down, Block removing etc. Block Tool have an ability to add own settings and actions to this menu.
In this guide we will add a three settings to our Simple Image Tool:
Add border to image
Stretch image to full-width of container
Add background to image
All you need to know for doing a Block settings is a renderSettings
We need to create our actions elements and add a handlers to them. It can be a buttons, inputs and other controls.
Let's add a three buttons to Block Actions menu with renderSettings method. This method should return a single element — a wrapper.
class SimpleImage {
constructor(){
this.data = data;
this.wrapper = undefined;
}
// ... previously added methods
renderSettings(){
const settings = [
{
name: 'withBorder',
icon: `<svg width="20" height="20" viewBox="0 0 20 20" xmlns="http://www.w3.org/2000/svg"><path d="M15.8 10.592v2.043h2.35v2.138H15.8v2.232h-2.25v-2.232h-2.4v-2.138h2.4v-2.28h2.25v.237h1.15-1.15zM1.9 8.455v-3.42c0-1.154.985-2.09 2.2-2.09h4.2v2.137H4.15v3.373H1.9zm0 2.137h2.25v3.325H8.3v2.138H4.1c-1.215 0-2.2-.936-2.2-2.09v-3.373zm15.05-2.137H14.7V5.082h-4.15V2.945h4.2c1.215 0 2.2.936 2.2 2.09v3.42z"/></svg>`
},
{
name: 'stretched',
icon: `<svg width="17" height="10" viewBox="0 0 17 10" xmlns="http://www.w3.org/2000/svg"><path d="M13.568 5.925H4.056l1.703 1.703a1.125 1.125 0 0 1-1.59 1.591L.962 6.014A1.069 1.069 0 0 1 .588 4.26L4.38.469a1.069 1.069 0 0 1 1.512 1.511L4.084 3.787h9.606l-1.85-1.85a1.069 1.069 0 1 1 1.512-1.51l3.792 3.791a1.069 1.069 0 0 1-.475 1.788L13.514 9.16a1.125 1.125 0 0 1-1.59-1.591l1.644-1.644z"/></svg>`
},
{
name: 'withBackground',
icon: `<svg width="20" height="20" viewBox="0 0 20 20" xmlns="http://www.w3.org/2000/svg"><path d="M10.043 8.265l3.183-3.183h-2.924L4.75 10.636v2.923l4.15-4.15v2.351l-2.158 2.159H8.9v2.137H4.7c-1.215 0-2.2-.936-2.2-2.09v-8.93c0-1.154.985-2.09 2.2-2.09h10.663l.033-.033.034.034c1.178.04 2.12.96 2.12 2.089v3.23H15.3V5.359l-2.906 2.906h-2.35zM7.951 5.082H4.75v3.201l3.201-3.2zm5.099 7.078v3.04h4.15v-3.04h-4.15zm-1.1-2.137h6.35c.635 0 1.15.489 1.15 1.092v5.13c0 .603-.515 1.092-1.15 1.092h-6.35c-.635 0-1.15-.489-1.15-1.092v-5.13c0-.603.515-1.092 1.15-1.092z"/></svg>`
}
];
const wrapper = document.createElement('div');
settings.forEach( tune => {
let button = document.createElement('div');
button.classList.add('cdx-settings-button');
button.innerHTML = tune.icon;
wrapper.appendChild(button);
});
return wrapper;
}
}
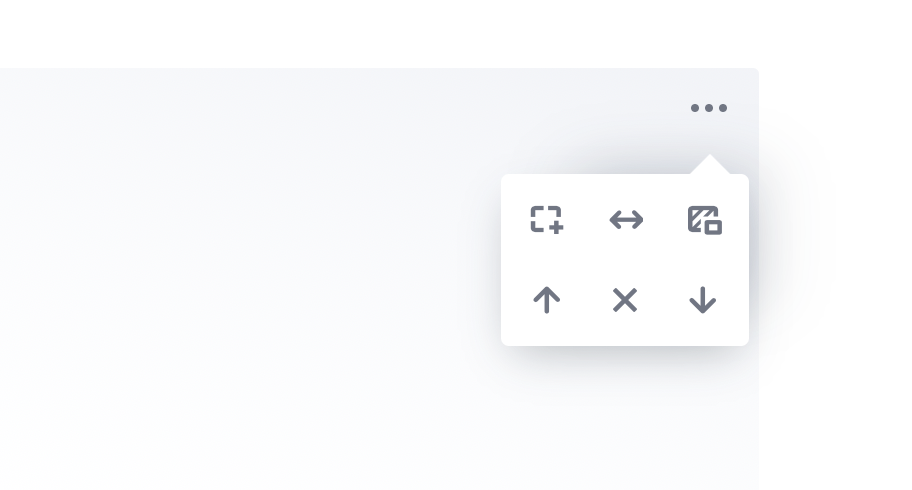
Try to open Block Settings menu — you should see three our buttons:
Before we go next, let's move the settings list to the class's constructor (or getter) — we should be able to access them from other methods.
class SimpleImage {
// ... toolbox
constructor({data}){
this.data = data;
this.wrapper = undefined;
this.settings = [
{
name: 'withBorder',
icon: `<svg width="20" height="20" viewBox="0 0 20 20" xmlns="http://www.w3.org/2000/svg"><path d="M15.8 10.592v2.043h2.35v2.138H15.8v2.232h-2.25v-2.232h-2.4v-2.138h2.4v-2.28h2.25v.237h1.15-1.15zM1.9 8.455v-3.42c0-1.154.985-2.09 2.2-2.09h4.2v2.137H4.15v3.373H1.9zm0 2.137h2.25v3.325H8.3v2.138H4.1c-1.215 0-2.2-.936-2.2-2.09v-3.373zm15.05-2.137H14.7V5.082h-4.15V2.945h4.2c1.215 0 2.2.936 2.2 2.09v3.42z"/></svg>`
},
{
name: 'stretched',
icon: `<svg width="17" height="10" viewBox="0 0 17 10" xmlns="http://www.w3.org/2000/svg"><path d="M13.568 5.925H4.056l1.703 1.703a1.125 1.125 0 0 1-1.59 1.591L.962 6.014A1.069 1.069 0 0 1 .588 4.26L4.38.469a1.069 1.069 0 0 1 1.512 1.511L4.084 3.787h9.606l-1.85-1.85a1.069 1.069 0 1 1 1.512-1.51l3.792 3.791a1.069 1.069 0 0 1-.475 1.788L13.514 9.16a1.125 1.125 0 0 1-1.59-1.591l1.644-1.644z"/></svg>`
},
{
name: 'withBackground',
icon: `<svg width="20" height="20" viewBox="0 0 20 20" xmlns="http://www.w3.org/2000/svg"><path d="M10.043 8.265l3.183-3.183h-2.924L4.75 10.636v2.923l4.15-4.15v2.351l-2.158 2.159H8.9v2.137H4.7c-1.215 0-2.2-.936-2.2-2.09v-8.93c0-1.154.985-2.09 2.2-2.09h10.663l.033-.033.034.034c1.178.04 2.12.96 2.12 2.089v3.23H15.3V5.359l-2.906 2.906h-2.35zM7.951 5.082H4.75v3.201l3.201-3.2zm5.099 7.078v3.04h4.15v-3.04h-4.15zm-1.1-2.137h6.35c.635 0 1.15.489 1.15 1.092v5.13c0 .603-.515 1.092-1.15 1.092h-6.35c-.635 0-1.15-.489-1.15-1.092v-5.13c0-.603.515-1.092 1.15-1.092z"/></svg>`
}
];
}
// ... render
// ... _createImage
// ... save
// ... validate
renderSettings(){
const wrapper = document.createElement('div');
this.settings.forEach( tune => {
let button = document.createElement('div');
button.classList.add('cdx-settings-button');
button.innerHTML = tune.icon;
wrapper.appendChild(button);
});
return wrapper;
}
}
As mentioned above, you can create any UI elements in renderSettings. So adding handlers for them is in your area of responsibility .
Let's add a click listeners for our buttons. It will toggle an «active » CSS modifier and fire a callback.
renderSettings(){
const wrapper = document.createElement('div');
this.settings.forEach( tune => {
let button = document.createElement('div');
button.classList.add('cdx-settings-button');
button.innerHTML = tune.icon;
wrapper.appendChild(button);
button.addEventListener('click', () => {
this._toggleTune(tune.name);
button.classList.toggle('cdx-settings-button--active');
});
});
return wrapper;
}
/**
* @private
* Click on the Settings Button
* @param {string} tune — tune name from this.settings
*/
_toggleTune(tune) {
console.log('Image tune clicked', tune);
}
☝️
Note.
You can write your own CSS classes and styles to create buttons. In this example, we use base CSS classes for Block Tunes provided by Editor.js. In the next chapter, we will get them by
Styles API .
☝️
Update
Since version 2.26, you can use the
Menu Config — a simple object specifying how the Tune button should look. Just pass
icon,
label, and
onActivate callbacks instead of rendering the HTML element and binding events on it manually.
It's time to decide where Image settings will be stored. Because it is similar with url and caption we will place it in this.data and return with Tool's save method.
Modify class's constructor, toggleTune and save method:
class SimpleImage {
// ... toolbox
constructor({data}){
- this.data = data;
+ this.data = {
+ url: data.url || '',
+ caption: data.caption || '',
+ withBorder: data.withBorder !== undefined ? data.withBorder : false,
+ withBackground: data.withBackground !== undefined ? data.withBackground : false,
+ stretched: data.stretched !== undefined ? data.stretched : false,
+ };
this.wrapper = undefined;
this.settings = [
{
name: 'withBorder',
icon: `<svg width="20" height="20" viewBox="0 0 20 20" xmlns="http://www.w3.org/2000/svg"><path d="M15.8 10.592v2.043h2.35v2.138H15.8v2.232h-2.25v-2.232h-2.4v-2.138h2.4v-2.28h2.25v.237h1.15-1.15zM1.9 8.455v-3.42c0-1.154.985-2.09 2.2-2.09h4.2v2.137H4.15v3.373H1.9zm0 2.137h2.25v3.325H8.3v2.138H4.1c-1.215 0-2.2-.936-2.2-2.09v-3.373zm15.05-2.137H14.7V5.082h-4.15V2.945h4.2c1.215 0 2.2.936 2.2 2.09v3.42z"/></svg>`
},
{
name: 'stretched',
icon: `<svg width="17" height="10" viewBox="0 0 17 10" xmlns="http://www.w3.org/2000/svg"><path d="M13.568 5.925H4.056l1.703 1.703a1.125 1.125 0 0 1-1.59 1.591L.962 6.014A1.069 1.069 0 0 1 .588 4.26L4.38.469a1.069 1.069 0 0 1 1.512 1.511L4.084 3.787h9.606l-1.85-1.85a1.069 1.069 0 1 1 1.512-1.51l3.792 3.791a1.069 1.069 0 0 1-.475 1.788L13.514 9.16a1.125 1.125 0 0 1-1.59-1.591l1.644-1.644z"/></svg>`
},
{
name: 'withBackground',
icon: `<svg width="20" height="20" viewBox="0 0 20 20" xmlns="http://www.w3.org/2000/svg"><path d="M10.043 8.265l3.183-3.183h-2.924L4.75 10.636v2.923l4.15-4.15v2.351l-2.158 2.159H8.9v2.137H4.7c-1.215 0-2.2-.936-2.2-2.09v-8.93c0-1.154.985-2.09 2.2-2.09h10.663l.033-.033.034.034c1.178.04 2.12.96 2.12 2.089v3.23H15.3V5.359l-2.906 2.906h-2.35zM7.951 5.082H4.75v3.201l3.201-3.2zm5.099 7.078v3.04h4.15v-3.04h-4.15zm-1.1-2.137h6.35c.635 0 1.15.489 1.15 1.092v5.13c0 .603-.515 1.092-1.15 1.092h-6.35c-.635 0-1.15-.489-1.15-1.092v-5.13c0-.603.515-1.092 1.15-1.092z"/></svg>`
}
];
}
// ... render
// ... _createImage
save(blockContent){
const image = blockContent.querySelector('img');
const caption = blockContent.querySelector('input');
- return {
+ return Object.assign(this.data, {
url: image.src,
caption: caption.value
- }
+ });
}
// ... validate
// ... renderSettings
/**
* @private
* Click on the Settings Button
* @param {string} tune — tune name from this.settings
*/
_toggleTune(tune) {
- console.log('Image tune clicked', tune);
+ this.data[tune] = !this.data[tune];
}
}
Now you can try to toggle some action, for example «Stretch to full-width» and click on «Save» button. In output JSON you will see default and toggled options state:
{
"time": 1552931826639,
"blocks": [
{
"type": "image",
"data": {
"url": "https://cdn.pixabay.com/photo/2017/09/01/21/53/blue-2705642_1280.jpg",
"caption": "Here is a caption field",
"withBorder": false,
"withBackground": false,
"stretched": true
}
}
],
"version": "2.11.10"
}
For now, our settings can be toggled and saved, but UI does not react to this changes. Lets add a method that will update a view corresponding with options. And call this method from _toggleTune and from _createImage.
class SimpleImage {
// ... toolbox
// ... constructor
// ... render
_createImage(url, captionText){
const image = document.createElement('img');
const caption = document.createElement('input');
image.src = url;
caption.placeholder = 'Caption...';
caption.value = captionText || '';
this.wrapper.innerHTML = '';
this.wrapper.appendChild(image);
this.wrapper.appendChild(caption);
this._acceptTuneView();
}
// ... save
// ... validate
// ... renderSettings
/**
* @private
* Click on the Settings Button
* @param {string} tune — tune name from this.settings
*/
_toggleTune(tune) {
this.data[tune] = !this.data[tune];
this._acceptTuneView();
}
/**
* Add specified class corresponds with activated tunes
* @private
*/
_acceptTuneView() {
this.settings.forEach( tune => {
this.wrapper.classList.toggle(tune.name, !!this.data[tune.name]);
});
}
}
Then, add a few CSS styles:
.simple-image.withBorder img {
border: 1px solid #e8e8eb;
}
.simple-image.withBackground {
background: #eff2f5;
padding: 10px;
}
.simple-image.withBackground img {
display: block;
max-width: 60%;
margin: 0 auto 15px;
}
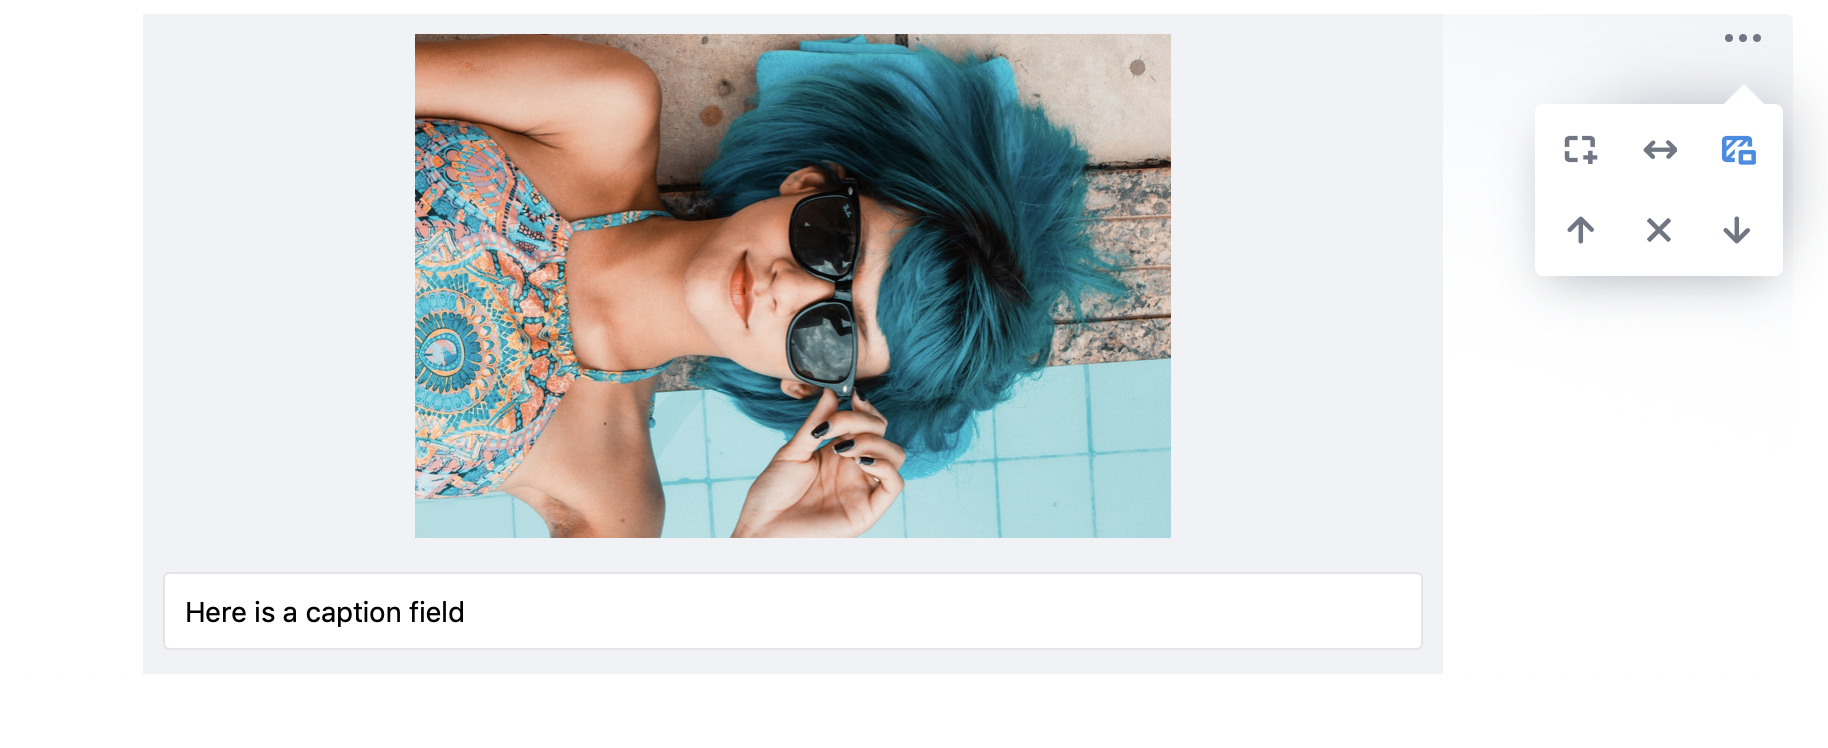
UI will react to the settings toggling now:
Let's suppose we open previously saved article. Settings of Image Block should be accepted by renderSettings method to toggle buttons state.
To check it, update initial Editor data at the example.html. For example, set withBackground option as true.
const editor = new EditorJS({
autofocus: true,
tools: {
image: SimpleImage
},
data: {
time: 1552744582955,
blocks: [
{
type: "image",
data: {
url: "https://cdn.pixabay.com/photo/2017/09/01/21/53/blue-2705642_1280.jpg",
caption: 'Here is a caption field',
withBorder: false,
withBackground: true,
stretched: false
}
}
],
version: "2.11.10"
}
});
If you open Block settings now, you will see that all buttons is deactivated. We need to add an «active» CSS modifier to buttons if they have corresponded tune enabled:
renderSettings(){
const wrapper = document.createElement('div');
this.settings.forEach( tune => {
let button = document.createElement('div');
button.classList.add('cdx-settings-button');
+ button.classList.toggle('cdx-settings-button--active', this.data[tune.name]);
button.innerHTML = tune.icon;
wrapper.appendChild(button);
button.addEventListener('click', () => {
this._toggleTune(tune.name);
button.classList.toggle('cdx-settings-button--active');
});
});
return wrapper;
}
Now buttons will be highlighted depending on the tune state.
As you can note, we wrote styles only for «With background » and «With border » tunes. To create «Stretch image» handler we need to increase base width of Block content. There is an Core API method for this.
In next chapter we will learn how to use Core API by plugins.


